Thinking about a Litter Robot enclosure DIY project? You’re in the right place.
Creating a custom enclosure for your Litter Robot can be a fun and rewarding task. It not only helps to conceal the litter box but also adds a touch of style to your home. DIY enclosures can be tailored to fit your specific space, ensuring that your cat’s litter area blends seamlessly with your decor.
Whether you’re a seasoned DIY enthusiast or just starting, this project can be a manageable and enjoyable endeavor. In this guide, we’ll explore why a DIY enclosure might be the perfect solution and provide some tips to get you started.
Materials Needed
A tape measure is very important. You need a saw for cutting. A power drill will help a lot. Get a screwdriver and some screws. Pliers are useful too. Sandpaper will smooth rough edges. Safety glasses protect your eyes.
Wood is the main material. Plywood works well. Hinges are needed for doors. Get some nails and wood glue. Paint or varnish adds a nice finish. Felt pads can protect your floors. A latch is good for securing doors.

Credit: www.reddit.com
Planning Your Design
First, measure the area where you plan to place the enclosure. Make sure to leave enough room for the Litter Robot and for cleaning. This helps ensure the best fit. Use a measuring tape to get accurate dimensions. Write down the width, depth, and height.
Select a design that matches your home’s style. Modern, rustic, or classic styles are popular choices. Make sure the design is easy to build and suits your skills. Consider using materials like wood or metal. These are sturdy and look good.
Building The Frame
Start by choosing the right wood for the frame. Measure the dimensions of the Litter Robot. Cut the wood to match these measurements. Make sure each piece is straight and smooth. Use a saw to cut the wood. A hand saw or electric saw works well. Sand the edges to avoid splinters. You now have your wood pieces ready.
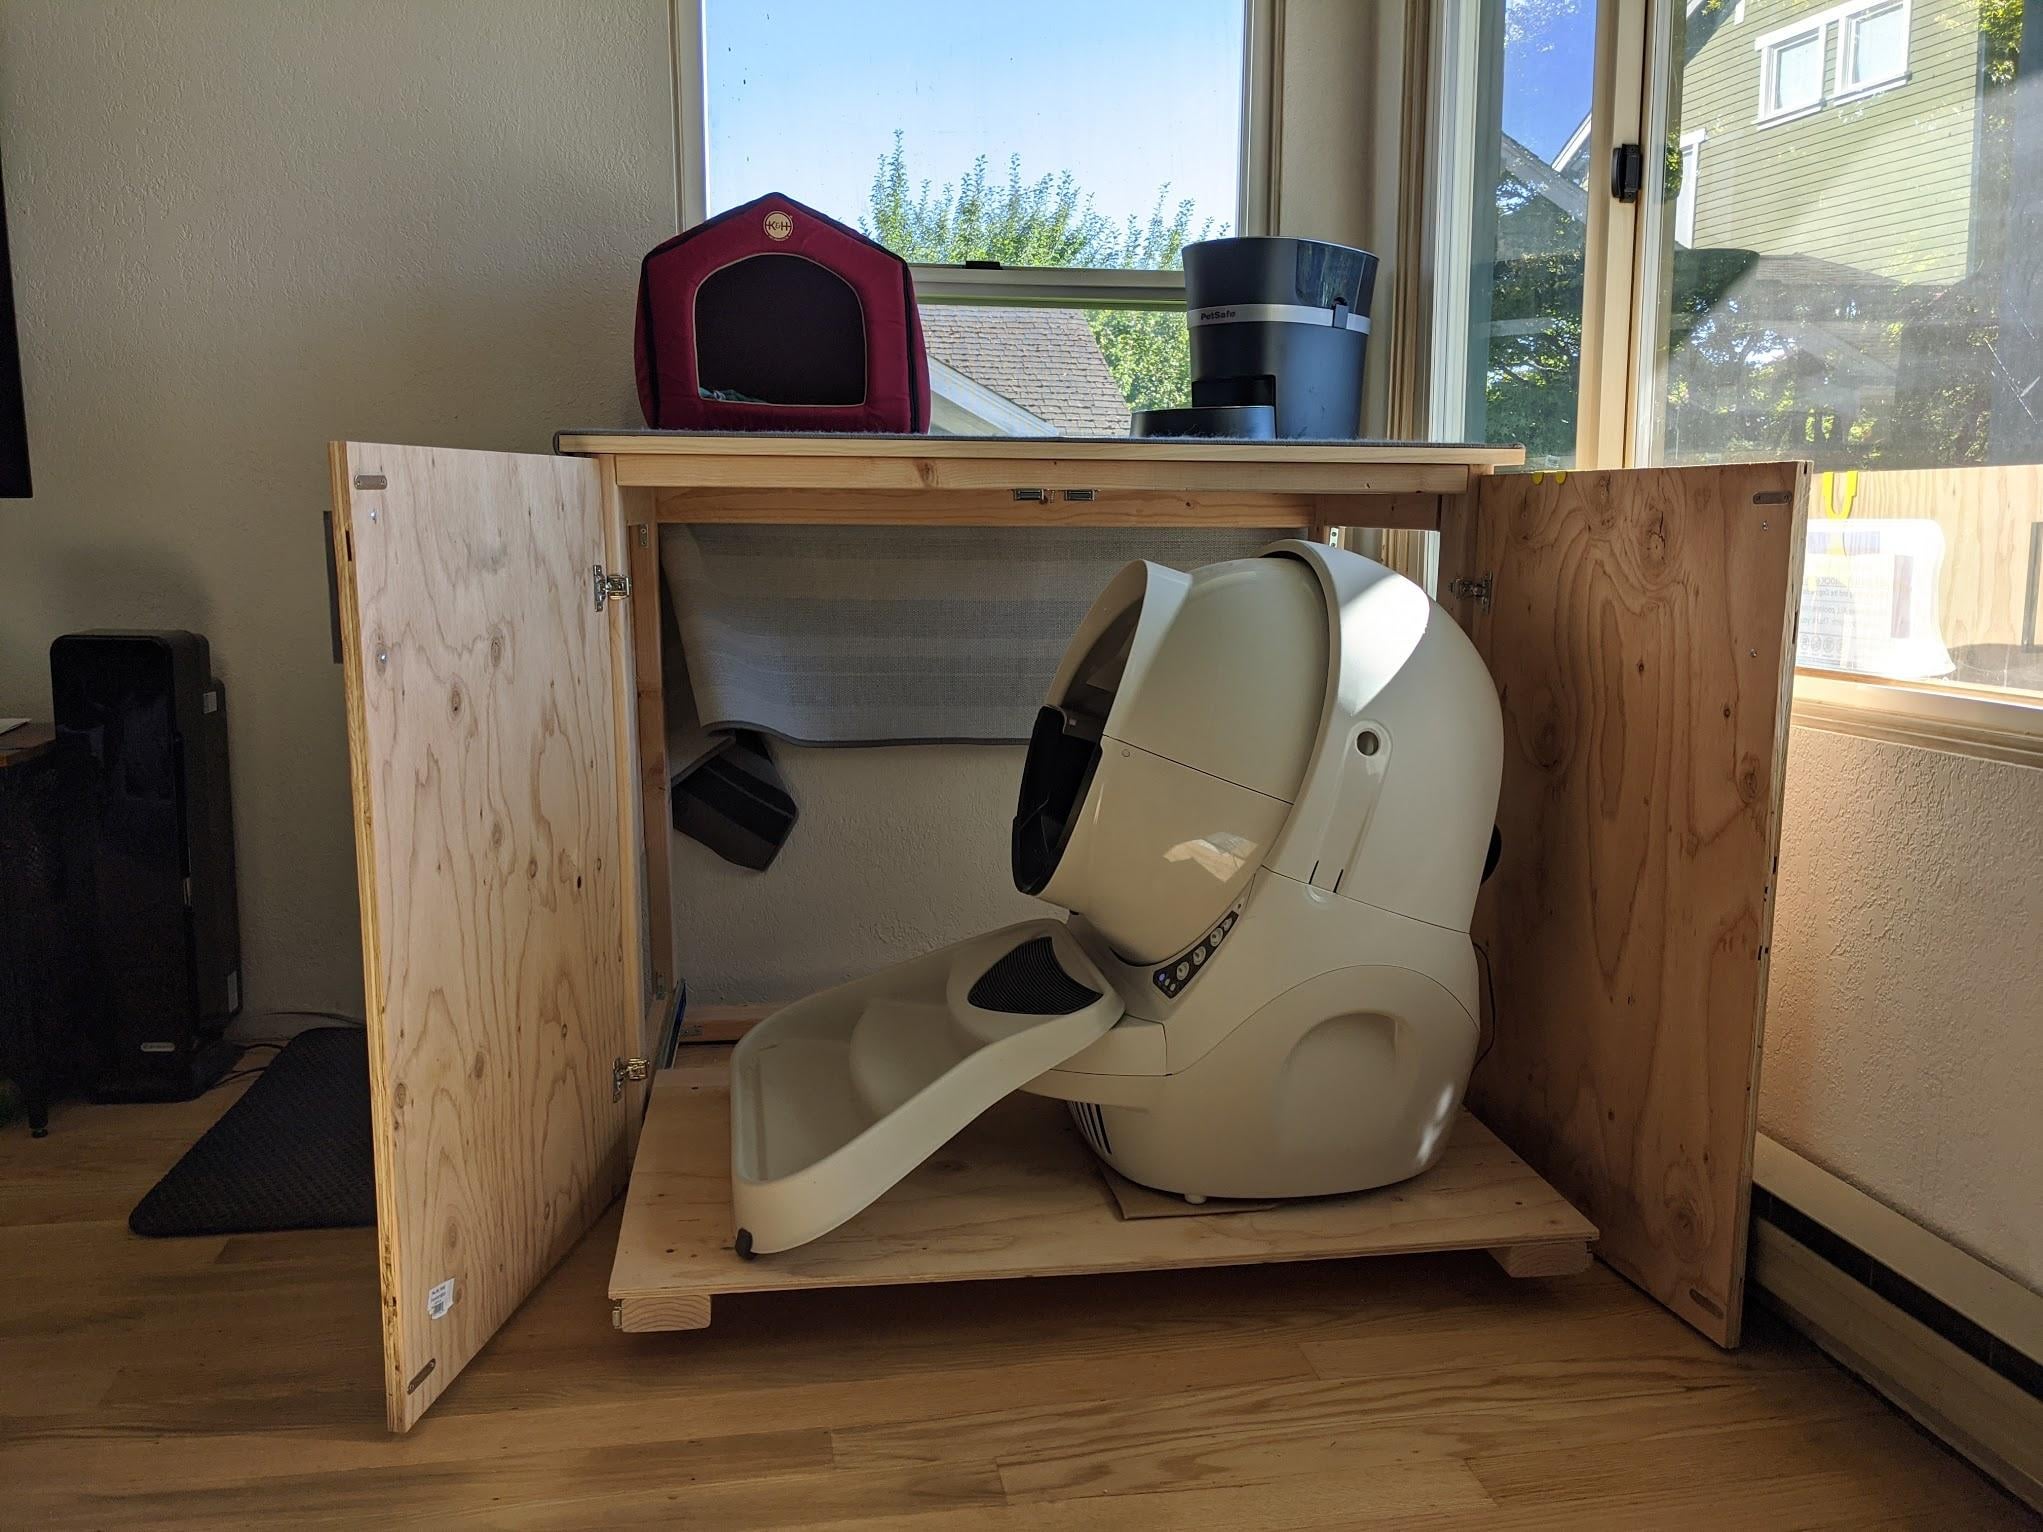
Lay the wood pieces on a flat surface. Connect the corners with screws. Use a drill to make holes first. Then, insert the screws tightly. Check that the frame is square. You can use a carpenter’s square for this. Tighten all screws. Make sure the frame does not wobble. Your frame is now assembled.
Credit: www.reddit.com
Adding The Walls
Building the walls for a Litter Robot enclosure DIY keeps your home tidy. It also gives your pet a cozy spot. Easy to build with basic materials, this project enhances both functionality and appearance.
Attaching Panels
First, gather all the necessary materials. Use screws to attach the panels. Make sure they fit tightly. This prevents gaps and keeps the enclosure stable. Check the alignment of each panel. Adjust if needed. This ensures a snug fit. Tighten all screws securely. This adds strength to the structure.
Creating Access Points
Determine where access points are needed. Cut out openings in the panels. These openings allow easy access to the litter robot. Make sure the cuts are smooth. This prevents injuries. Attach doors or flaps to these openings. Use hinges for easy movement. Secure the doors with locks or latches. This keeps the enclosure secure.
Finishing Touches
Start by choosing a good paint color. Use a primer first to help the paint stick. Apply the paint in thin, even coats. Let each coat dry before adding another. Once the paint is dry, apply a clear sealant. This helps protect the paint. It also makes the enclosure easier to clean. Sealant can be applied with a brush or spray. Make sure to cover all areas evenly.
Add some fun touches to make the enclosure unique. Use stickers or decals for decoration. You can also add stencils for patterns. Glue on some small, safe decorations like buttons or beads. Make sure everything is secure. Nothing should be loose or easy to chew. These little details make the enclosure look great. They also add a personal touch.

Credit: www.reddit.com
Integrating The Litter Robot
Place the Litter Robot in a quiet spot. Cats need peace when using it. Choose a place with low traffic. Ensure it is easy to reach. Avoid corners with no light. Cats like to see their surroundings.
Good airflow is vital for the Litter Robot. It helps control odors. Make some small holes in the enclosure. This will let fresh air in. Do not block the fan or vents. Check them often to keep them clean.
Maintaining Your Enclosure
Keep your Litter Robot enclosure clean. Remove debris and dirt regularly. Wipe surfaces with a damp cloth. Use mild soap if needed. Avoid harsh chemicals. They can damage the enclosure. Dry everything thoroughly. Moisture can cause mold and odors. Clean the litter box every week. This helps keep the area fresh.
Inspect the enclosure often. Check for any cracks or damage. Fix issues right away. Make sure the door works well. Lubricate hinges if needed. Look for loose parts. Tighten screws and bolts. Ensure the space is safe for your cat. Regular checks help maintain the enclosure’s condition.
Frequently Asked Questions
What Is A Litter Robot Enclosure?
A Litter Robot enclosure is a custom-built space to house the Litter Robot. It can help reduce mess, contain odors, and provide privacy for your cat.
How To Build A Litter Robot Enclosure?
To build a Litter Robot enclosure, measure the robot, select suitable materials, and ensure proper ventilation. Assemble according to your design.
Why Use A Litter Robot Enclosure?
Using a Litter Robot enclosure can help contain litter, reduce odors, and provide a private space for your cat. It can also enhance the appearance of your living space.
What Materials Are Best For An Enclosure?
The best materials for a Litter Robot enclosure are sturdy wood, MDF, or plastic. Ensure materials are easy to clean and durable.
Conclusion
Building your own Litter Robot enclosure can be a rewarding project. It provides a custom space for your pet’s needs. You save money and gain satisfaction from a job well done. Plus, it keeps your home tidy and stylish. With some effort, the result is both functional and attractive.
Happy crafting!