Building your own robotic hand can be a fun and educational project. It combines creativity, engineering, and a bit of patience.
A DIY robotic hand project is a great way to dive into the world of robotics. This project lets you explore the basics of mechanics and electronics while creating something tangible. You don’t need to be a tech expert to start; simple materials and tools can get you going.
Plus, the process can teach problem-solving skills and spark interest in STEM fields. Whether you’re a student, hobbyist, or just curious, this guide will help you build your own robotic hand from scratch. Get ready to learn, create, and have fun with this hands-on project.
Designing The Hand
A good model is essential for a robotic hand. Simple designs work best for beginners. 3D printed models are popular and easy to find. Look for open-source designs online. Many free designs are available. Pick one that suits your needs.
Creating a blueprint helps in building the hand. Start by drawing a basic sketch. This helps visualize the final product. Include all parts in the sketch. Fingers, joints, and thumb. Label each part clearly. Use a ruler for straight lines. Make sure the scale is accurate.
Building The Frame
Start by gathering all the materials. Use a pencil to mark the measurements. Cut each piece carefully with a saw. Smooth the edges with sandpaper for safety. Double-check your cuts. Ensure each part matches the design.
Lay out all the cut pieces. Assemble the frame using screws and glue. Make sure everything is tight. Align the parts properly. Test the movement of each joint. Adjust if necessary.
Adding Motors
Choose motors that fit your robotic hand design. Small and light motors work best. They should be easy to control. Check the power and speed of the motors. Pick ones that can move fingers smoothly. You need strong motors for firm grip. Cost is also a factor. Some motors are expensive. Find a balance between quality and price.
First, plan where each motor will go. Secure the motors firmly. Use screws or strong glue. Make sure the motors are aligned. They need to move fingers correctly. Connect motors to the robotic hand’s frame. Check each motor’s position. They should not wobble. Test motors before final attachment. Ensure they work well with your design.
Wiring The Hand
Connecting wires is a crucial step in your DIY robotic hand project. Start by gathering all necessary tools such as wires, a soldering iron, and soldering wire. Carefully strip the ends of each wire. This helps in making a good connection. Next, connect the wires to the respective points on the robotic hand. Ensure each wire is firmly attached. Use a soldering iron to secure the connections. Make sure no wires are loose. This prevents malfunctions.
After connecting the wires, double-check each connection. Ensure that all wires are properly insulated. This prevents short circuits. Use electrical tape or heat shrink tubing for insulation. Test the connections using a multimeter. This ensures continuity and proper flow of electricity. Make sure the wires are neatly organized. This helps in troubleshooting later.
Programming The Hand
First, you need to install the Arduino IDE. It is free and easy to use. Go to the Arduino website. Download the software. Follow the instructions to install it on your computer. Next, connect your Arduino board to the computer. Use a USB cable for this. Open the Arduino IDE. Select the correct board and port from the tools menu. Now, your setup is ready.
Start by writing a simple code. Open a new sketch in Arduino IDE. Type in the basic commands. For example, use “pinMode” to set up the pins. Use “digitalWrite” to control the servo motors. Test your code often. Upload it to the Arduino board. Check if the robotic hand moves. Make changes as needed.

Credit: pbskids.org
Testing And Troubleshooting
Start by checking all connections. Wires should be secure. Power on the robotic hand. Observe its movements. Each finger should move smoothly. If not, check for loose parts. Listen for unusual sounds. A grinding noise means something is wrong. Note any issues you find.
If a finger does not move, check the servo motor. Ensure it is connected. Sometimes wires get loose. Tighten them. If the hand does not power on, check the battery. It might need a charge. Look at all connections again. Make sure everything is in place. If the hand moves oddly, recalibrate it. Follow the instructions carefully. Small adjustments can make a big difference.
Enhancing The Project
Adding advanced features can make the robotic hand more useful. You can add sensors to detect objects. These sensors help the hand to pick up items better. Another feature is using stronger motors. Stronger motors can lift heavier objects. Lights can also be added. Lights show when the hand is working.
Future improvements can make the project even better. Using voice commands can be a great addition. Voice commands allow for easy control. Also, adding a wrist joint gives more movement. More movement makes the hand more flexible. Another idea is using better materials. Better materials make the hand last longer.

Credit: www.buzzfeed.com
Credit: www.youtube.com
Frequently Asked Questions
What Materials Are Needed For A Diy Robotic Hand?
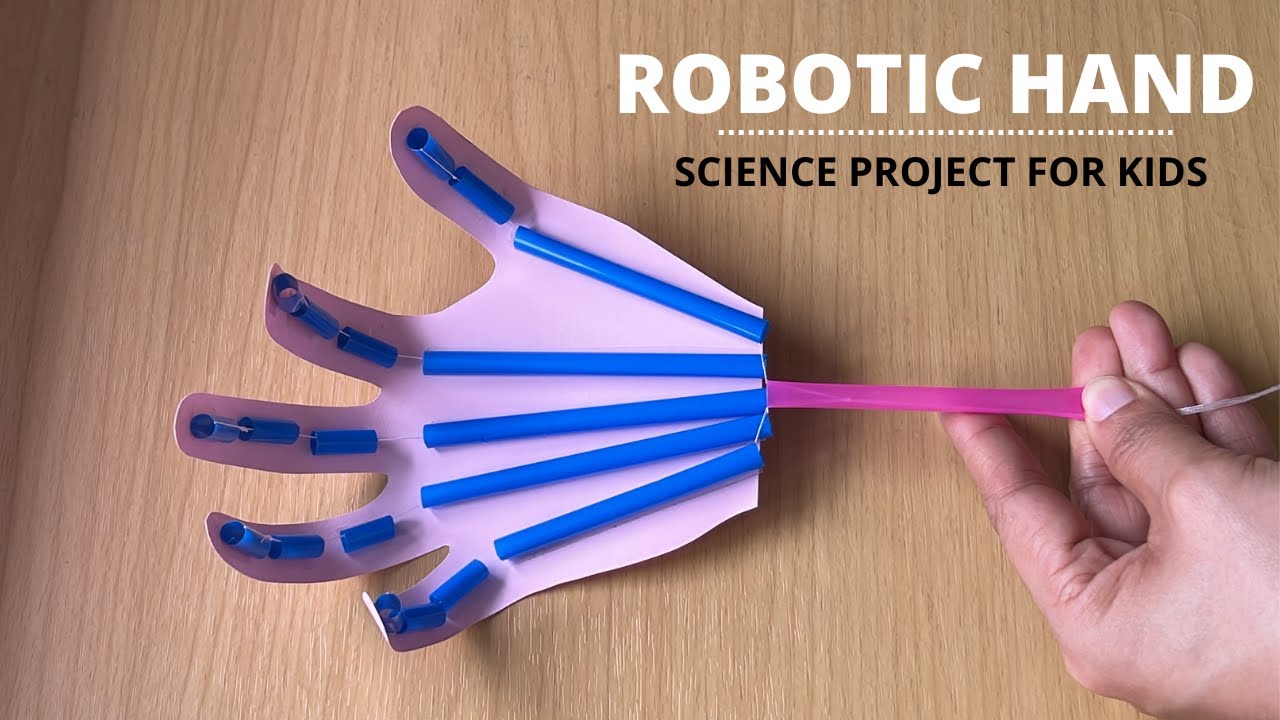
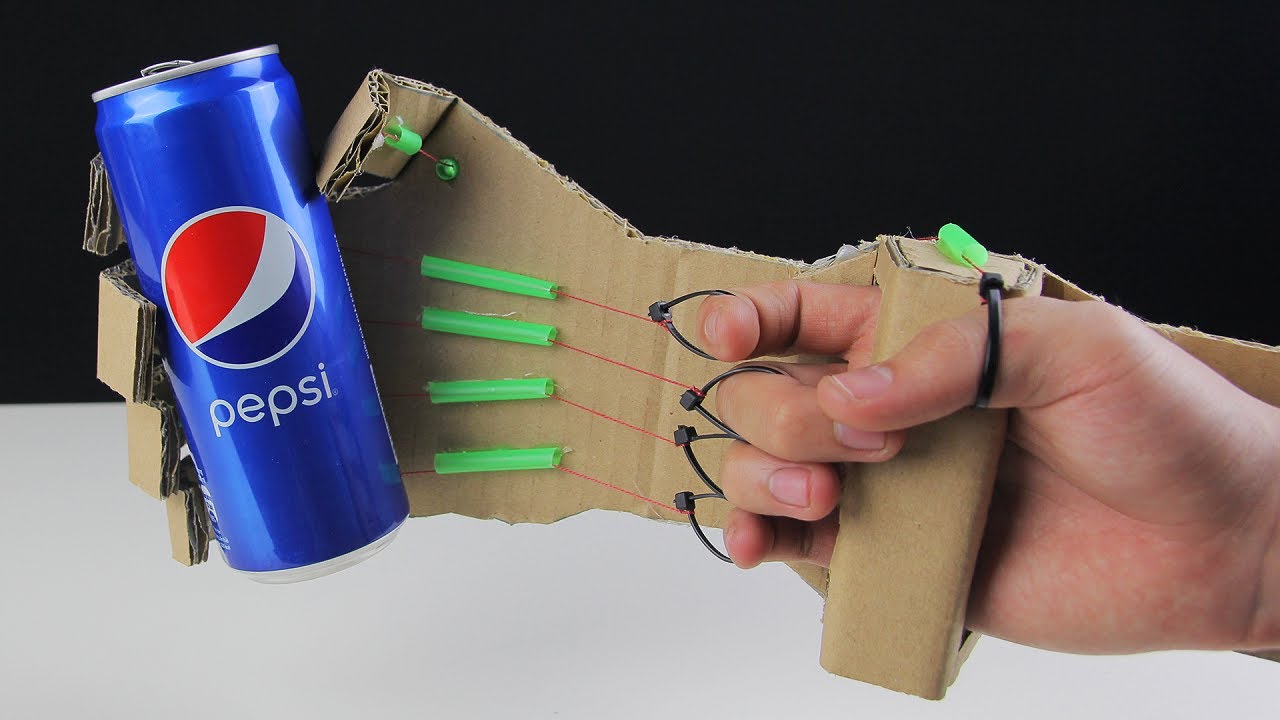
To build a DIY robotic hand, you need cardboard, servo motors, fishing line, straws, and a microcontroller. Additionally, you will require glue, scissors, and a battery pack. These materials are cost-effective and readily available.
How Long Does It Take To Complete?
The time to complete a DIY robotic hand project varies. On average, it takes about 5-7 hours. This includes cutting, assembling, and programming the components.
Can Beginners Build A Robotic Hand?
Yes, beginners can build a robotic hand. The project is designed to be simple and educational. With basic tools and instructions, even those new to robotics can succeed.
What Skills Are Required For This Project?
Basic skills in electronics, programming, and crafting are needed. Familiarity with microcontrollers like Arduino is helpful. However, detailed tutorials can guide you through the process.
Conclusion
Building a DIY robotic hand is a fun and educational project. It helps you understand robotics basics. You can use simple materials. Enjoy the process and learn new skills. Share your project with friends or family. Inspire others to try it too.
This project is great for all ages. It’s a hands-on way to explore technology. Keep experimenting and improving your designs. Happy building!